In addition to the operations described in the previous sections to upload and merge data, create actions, and run these actions, there are additional operations for the workflow that can be accessed through the
More
pull-down menu in the top-bar menu. The settings pages offer information about: workflow operations (export, rename, clone, etc.), column operations (change column type, rename, clone, etc.), scheduled actions, and view logs.
“The details are not the details. They make the design”
– Charles Eames
The
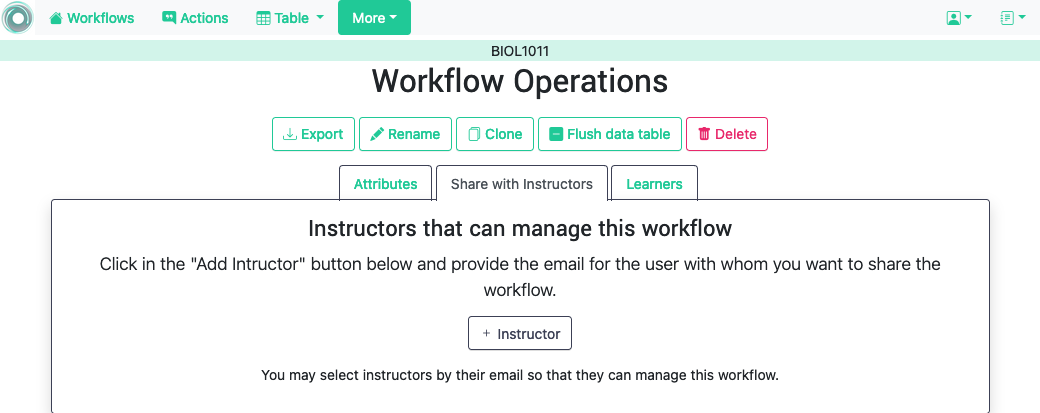
Workflow Operations
page is available through the
More
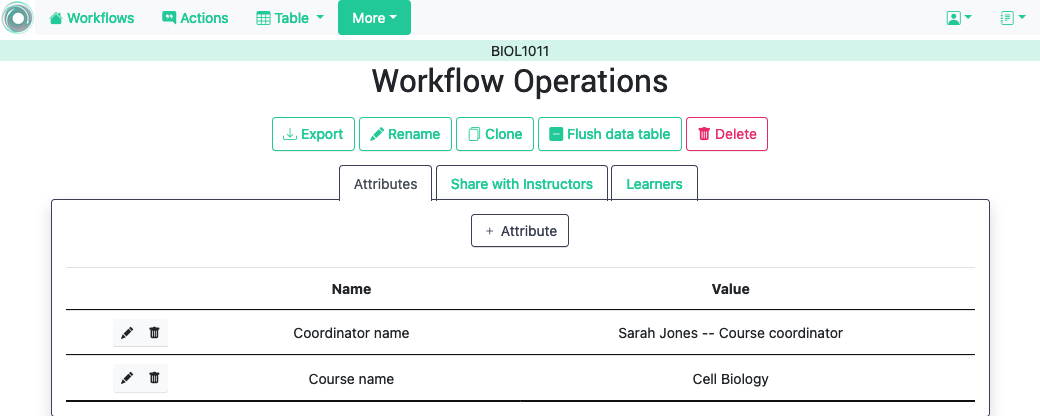
link at the top-bar menu. The page shows the information as illustrated by the following figure.
The buttons at the top of the page offer the following operations:
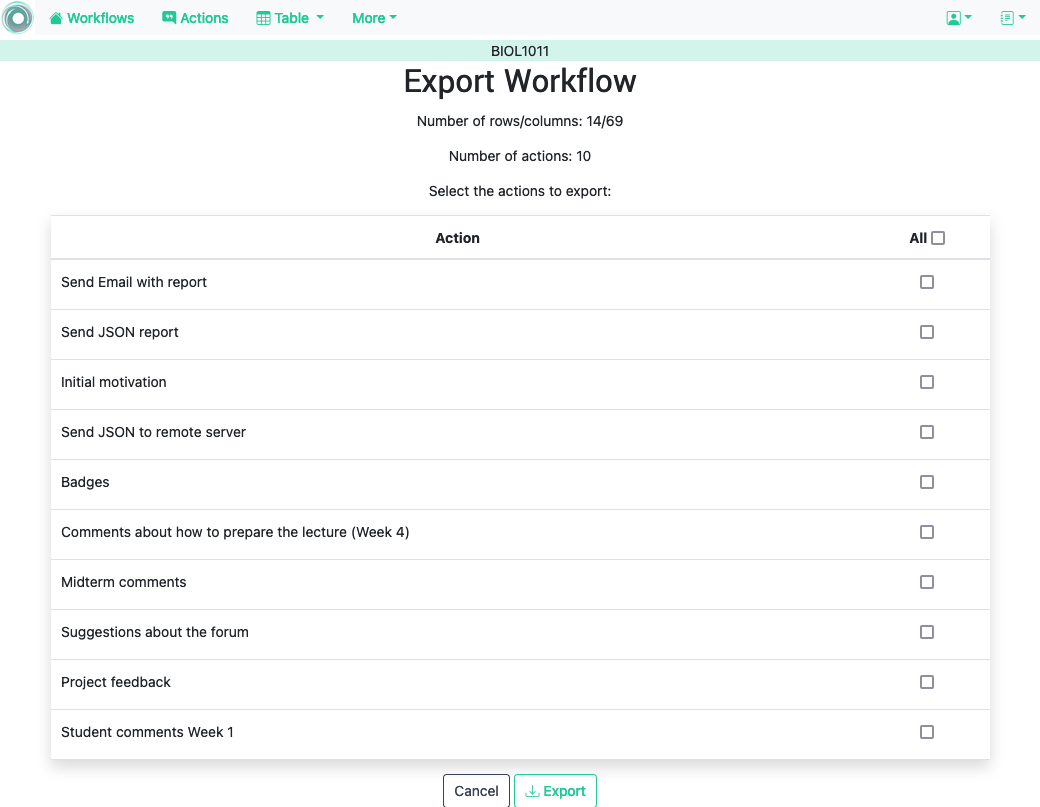
Export
This functionality allows you to take a snapshot of the content of the workflow and store it in a file for your records. You may select which actions are included in the exported file
The menu offers the possibility of exporting only the data, or the data
and
the
action
in the workflow.
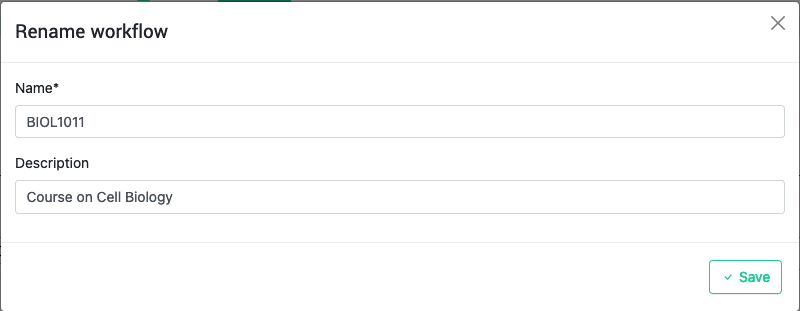
Rename
This functionality allows to change either the name or the description of the workflow.
Clone
This function creates a new workflow duplicating the data, actions and conditions of the current workflow. The new workflow will have the same name with the prefix
Copy of
.
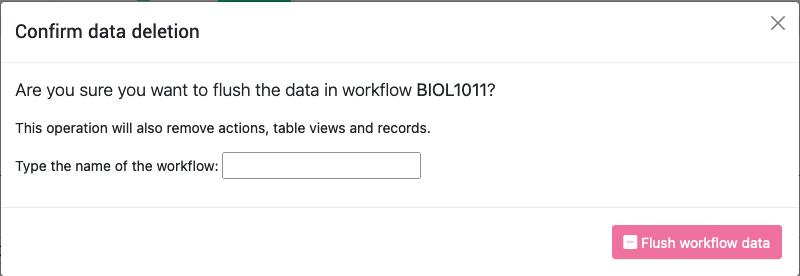
Flush data table
This operation deletes all the data attached to the workflow, but preserves the workflow structure (that is, the name and the description only).
Given the destructive nature of this operation the platform requires you to confirm this step.
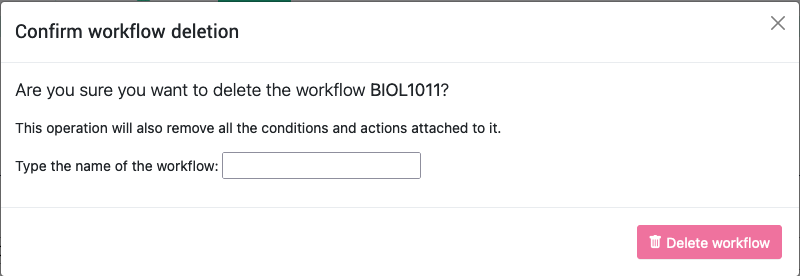
Delete
Operation similar to the previous one, but now the whole workflow is deleted and therefore unselected. If executed, the platform will go back to the list of workflows as this one is no longer available for operations.
As in the previous case, the platform asks for confirmation before carrying out the delete operation.
In addition to the buttons at the top, the
Workflow Operations
page offers two additional operations shown in separated tabs.
Attributes
This tab shows the operations to manage a dictionary of pairs
              (name,


              value)
. The names can e used in personalized text and they are replaced by the
value
.
The
Attribute
button opens a form to introduce the name and value of a new attribute. The table below this button shows the attributes available for the workflow. The
icon opens the form to edit its content. The
icon deletes the attribute.
The use of these attributes is to facilitate a single point of change when a value appears in multiple locations. For example, every personalized text action is singed with the name of the instructor. If that name changes, all actions need to be edited. On the other hand, if the actions contain the name of an attribute, just changing the attribute value propagates the change to all actions.
Share
The
Share
tab on the right of the page is used to manage the list of users that have access to this workflow. The
User
button opens a form to introduce a the id of the user to share the workflow.
The
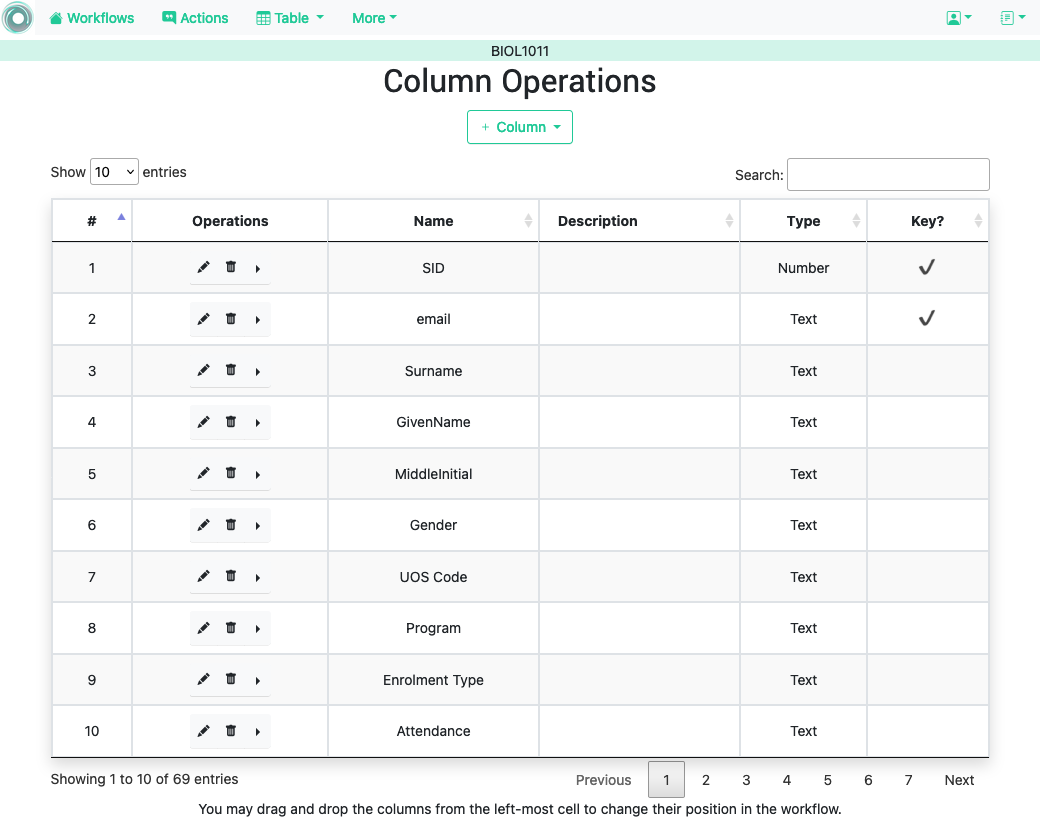
Column Operations
page is available through the
More
link at the top-bar menu. Columns in OnTask have substantial information and operations that is condensed in this page. The information is shown as illustrated by the following figure.
The buttons at the top of the page offer the following operations
Column
This menu opens three options: create a regular column, create a column combining the values of two existing columns, or create a new column with random values.
Add a regular column
Opens a dialog to create a new column in the table with the following fields:
Name (mandatory): column name (shown in the table)
Description: text that will be shown to the learners if the column is part of a survey action.
Data type (mandatory: The possible data types are
number
(representing both integers or real numbers),
string
,
boolean
(only possible values are
true
and
false
), and
datetime
(a date and time together).
An integer (mandatory) representing the position of the column in the table (a value zero will insert it at the end of the table).
Two date/time values to control the visibility of the column.
Comma-separated list of possible values. This field is to restrict the values in the column. The values have to be compatible with the specified data type.
Initial value to assign to all cells in the column.
Add a formula-derived column
This column is created by combining the values of existing columns using one of the operations addition, product, maximum, minimum, mean, median, standard deviation, conjunction or disjunction. The formula is only applied when the column is
created the current values of the other columns. The column is not refreshed if the operand change in the future.
Add a column with random values
This is useful to create columns for A/B testing. The new column is created with a random value from either a numeric range (starting at 0) or a set of strings.
Below the buttons to perform these operations the workflow columns are shown. If the number of columns is large, the information is divided into pages. The field at the top right of this list performs searches in all fields of all columns (name, type, etc). Each column has the following information (from left to right):
Change the name, description, unique and values allowed in the column. If the field
Has unique values per row
property is modified, OnTask checks if the values satisfy this condition.
The column may also have a
validity window
defined by two date/times. This validity is used when executing
action in
tasks.
Clone
Clones the column in the workflow changing its name adding the prefix
Copy of
to the name.
Statistics (only for non-key columns)
Shows a statistical summary of the values in the column. If the data type is
number
, the summary includes information about quartiles, a boxplot, and a histogram. For the rest of data types, the summary only includes the histogram.
Restrict
Assigns as
allowed values
for the column those currently stored. This operation is useful to transform a generic column into one with values limited to the current ones.
Delete
Deletes the column from the workflow. If there are conditions in the actions that use this column, those conditions will be removed from the action.
Make first column
Move this column to the first position in the workflow
Make last column
Move this column to the last position in the workflow
Name
Unique name for the workflow that cannot contain the quotes
‘
or
“
or start with
__
.
Description
Description of the column.
Type
One of integer, string, double, boolean or date/time.
Key?
Field stating if it is a
key column
, that is, the values are different or unique for all rows. OnTask detects automatically this property when the data for a new column is loaded. You may edit and change this properly as long as the two requirements are satisfied: the values have to be unique for all rows, and there must be at least one key column per workflow.
The position of the columns can also be changed by dragging by the number (left-most column) and dropping them in the new position.
When scheduling the execution of an operation, the following fields are always requested at the top of the form:
Name
A name to identify this scheduling (a user may have several of these actions pending in a workflow)
Description
A brief description explaining this scheduled action (for example, “send reminder before the exam”)
When to execute the action
A date/time in the future when the action will be executed.
Multiple executions?
Check this box if you want the action to execute more than once. You may define the a start and stop date, and a expression with the frequency of execution.
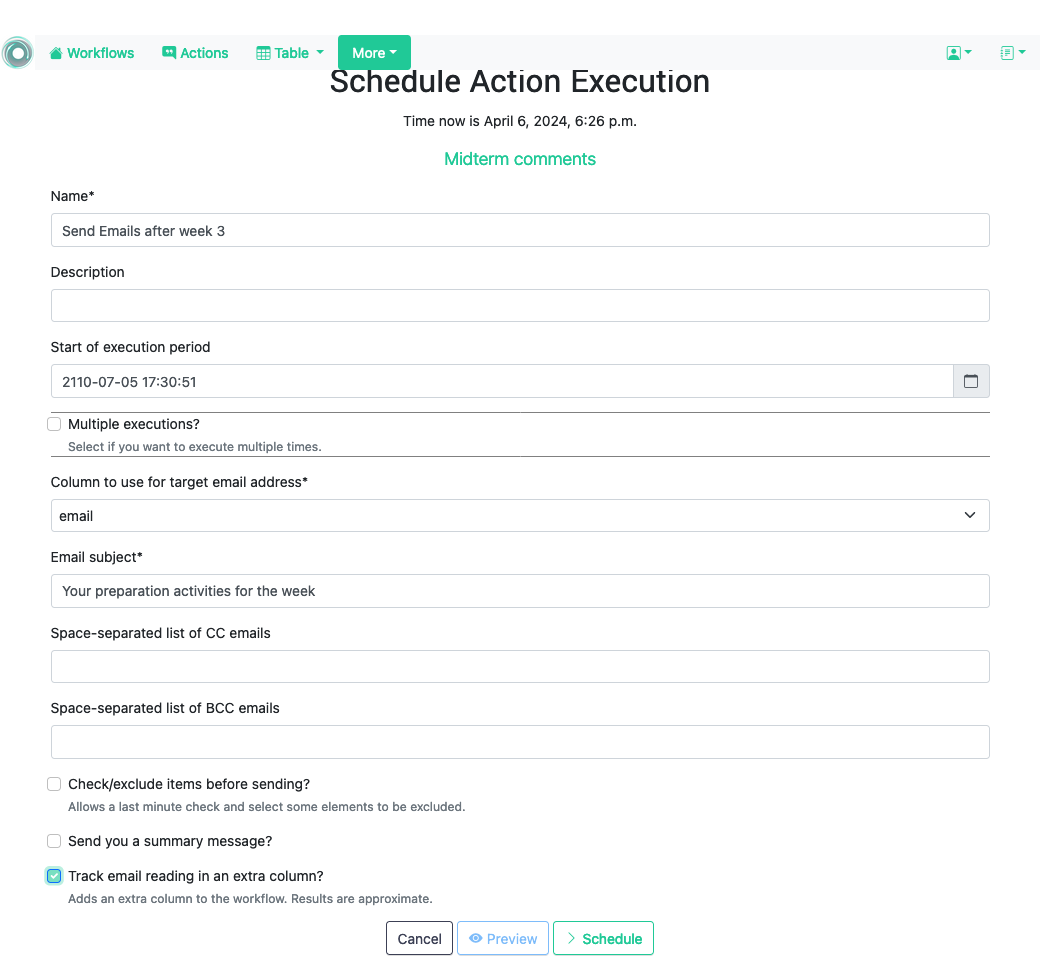
The following figure shows the information requested to schedule the execution of a personalized text action (sending emails to learners):
The additional fields in this form are:
Column containing email
The column in the table used to fill out the destination email. OnTask will check that the values in that column are proper email addresses.
Email subject
The text to be included in the email subjects.
Comma separated list of CC emails
A comma separated list of emails to include in the
carbon copy
(or CC) field of the email.
Comma separated list of BCC emails
A comma separated list of emails to include in the
blind carbon copy
(or BCC) field of the email.
Send confirmation email
Select this option if you want a confirmation email sent to you.
Track when emails are read
Try to detect if the email is read. OnTask adds an extra column to the table to store the number of times the message is opened. This detection relies on how the email client processes the message, therefore, the information in this column may not be accurate.
Check/exclude emails
If selected, this option inserts an extra step showing the emails and offering the possibility to eliminate them from the action. This option is useful to perform a final check and remove emails that cannot be removed with the action filter.
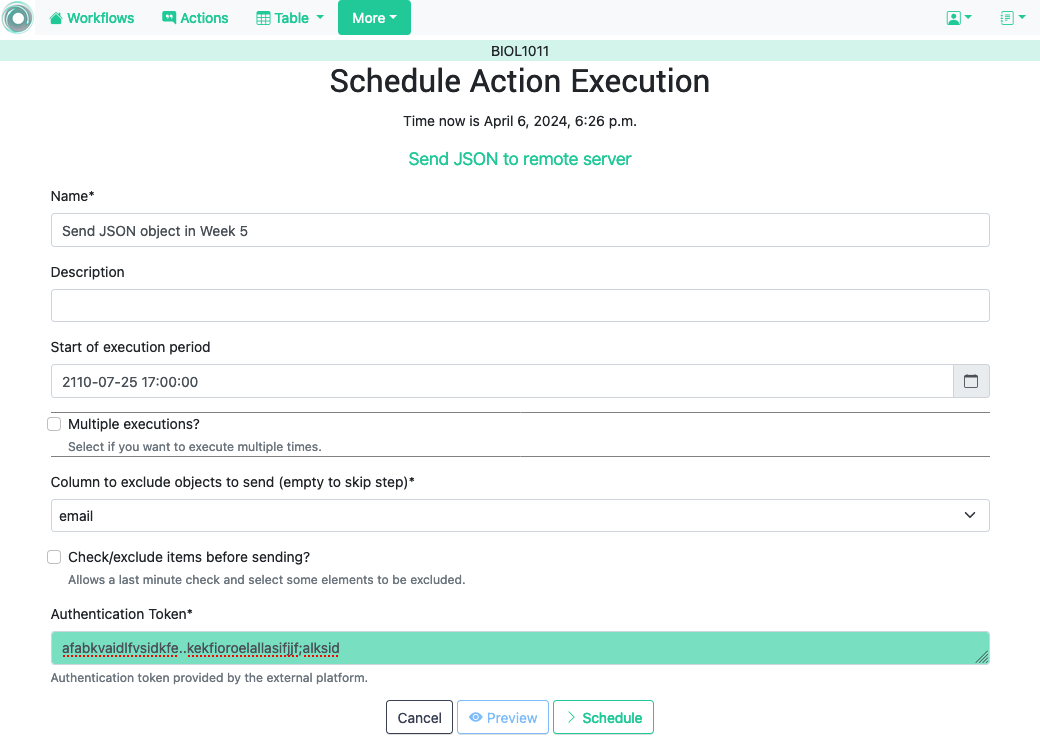
The following figure shows the information requested to schedule the execution of a personalized JSON action (sending JSON object to another platform):
The additional fields in this form are:
Column to select elements
A column to show its values and allow to review and exclude some of the entries. This option is useful to perform a final check and remove entries that cannot be removed with the action filter.
Authentication Token
The string to be use to authenticate with the external platform.
3.6.3.3.
Scheduling a Personalized Canvas Email Action
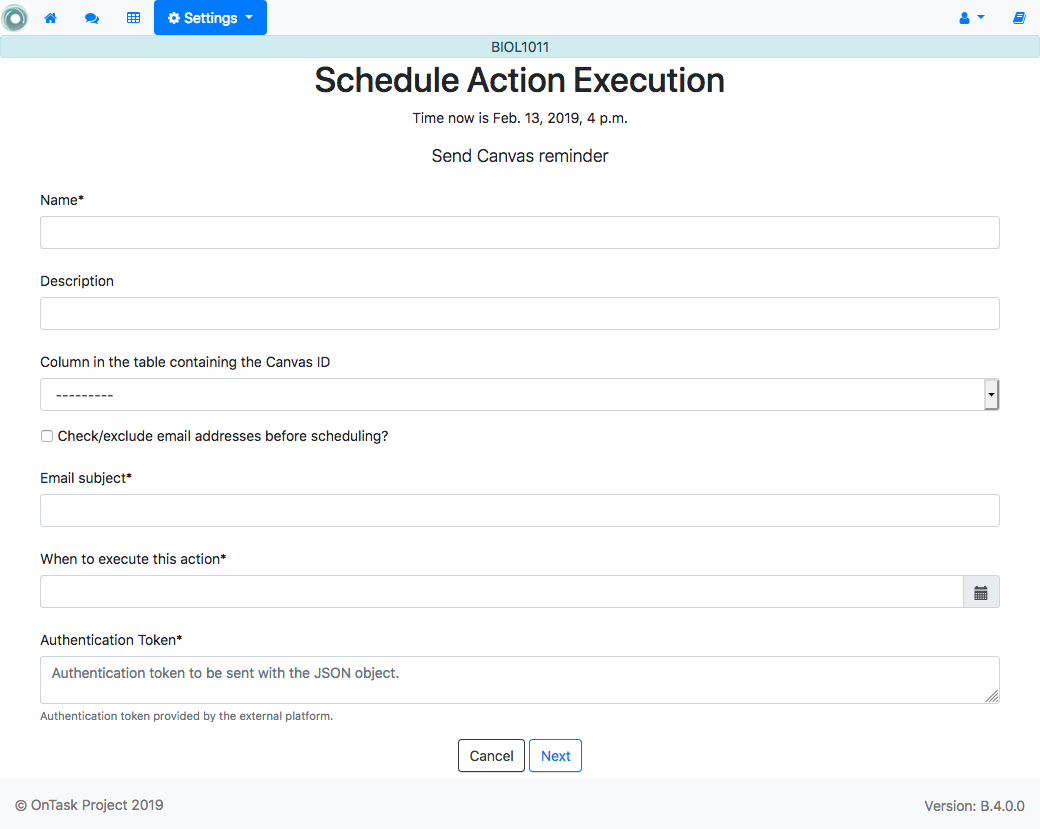
If OnTask is
appropriately configured
to send emails using the Canvas API, the actions can be scheduled providing the information through a form as shown in the following figure.
The fields in this form are:
Name
A name to identify this scheduling (not to be confused with the name of the action that has already been selected).
Description
A brief description explaining this scheduled action (for example, “send reminder the night before the exam).
Column in the table containing the Canvas ID
This field is mandatory because OnTask needs to know which column to use to differentiate the emails to send to Canvas.
Email subject
Text to include as subject of the message.
When to execute the action
A date/time value in the future.
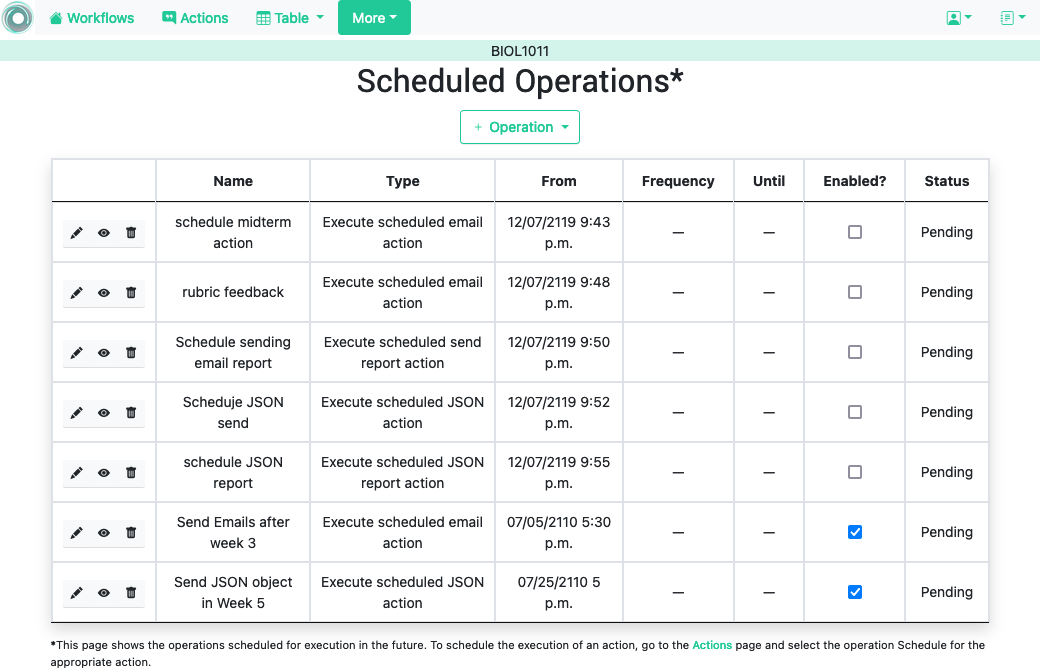
The table showing all the action scheduling operations can be access through the
More
link in the top-bar menu selecting the
Scheduled operations
link. The list of scheduled actions is shown as illustrated in the following figure.
The operations available for each scheduled execution are:
Edit
Edit the elements in the scheduled operation.
View details
View all the details for this scheduled execution (includes values in the payload)
The platform keeps a log of most of the operations that are executed when managing a workflow. These records are available through the
View Logs
link in the
More
pull down menu at the top-bar menu. The page shows information about the records in tabular form. The following figure shows an example.
The
CSV Download
button allows to download the logs in CSV format for further processing. Additionally, the content of the table is paginated and the links to access each page are shown at the button. The records can be searched using the box at the top right corner of the table.